
The fine print of your adventure travel insurance is not a suggestion; it is a set of contractual obligations you must actively prove you have met.
- Standard policies contain critical exclusions for altitude, equipment, and personal conduct that can instantly void coverage in an emergency.
- Proving you were not negligent requires creating a deliberate evidentiary trail using GPS logs, certified guides, and documented decisions.
Recommendation: Shift your planning focus from just the itinerary to building a verifiable record of your compliance with the policy’s terms and conditions.
You’ve meticulously planned the expedition. The gear is top-of-the-line, the route is challenging but achievable, and you’ve purchased a comprehensive travel insurance policy for peace of mind. The common advice is to get an « adventure add-on » and read the policy. But this guidance is dangerously incomplete. It overlooks a fundamental truth: a travel insurance policy is a conditional contract. When you are injured at 5,000 meters or lost in a jungle, that policy does not guarantee a payout; it guarantees a review.
The success or failure of a claim often hinges not on the incident itself, but on your ability to prove you adhered to every clause, from the obvious to the obscure. This includes everything from using a properly certified guide to demonstrating that you made a rational decision to turn back in deteriorating weather. The assumption that your insurer will simply take your word for it is a costly mistake. An insurer’s primary role is to manage risk and validate claims against the policy’s strict terms, looking for any breach of contract, however small.
But what if the key to ensuring coverage wasn’t just avoiding recklessness, but actively building an irrefutable body of evidence that you acted responsibly? This guide reframes adventure planning through the lens of a cautious insurance broker. We will move beyond the platitudes and dissect the specific actions and documentation—the evidentiary trail—required to fortify your claim against denial. We will examine the critical failures in standard coverage, the technology that creates your alibi, the verification processes that matter, and the non-negotiable rules of engagement that keep your policy valid when you need it most.
This article details the crucial steps to ensure your planning aligns perfectly with your insurance policy’s stringent requirements. The following sections break down the specific areas where adventurous travelers most often face claim denials and provide the framework for building a case of contractual compliance.
Summary: How to Plan Adventure Travel So Your Insurance Actually Pays Out
- Why « Standard » Medevac Coverage Fails Above 4,000 Meters?
- Garmin inReach vs Spot: Which Device Saves Lives in Dead Zones?
- How to Verify a Guide’s Certification in Unregulated Countries?
- The « Last Minute » Vaccination Mistake That Ruins Jungle Expeditions
- When to Abort an Expedition: 3 Weather Signs You Must Obey?
- Outdoor Adventure Tech: Which Satellite Messenger Is Essential for Off-Grid Safety?
- Eco-Conscious Outdoor Adventure Exploration: How to Hike National Parks Without Leaving a Carbon Footprint?
- Outdoor Adventure Tech: Which Satellite Messenger Is Essential for Off-Grid Safety?
Why « Standard » Medevac Coverage Fails Above 4,000 Meters?
One of the most critical and misunderstood clauses in any travel insurance policy is « medical evacuation. » Most travelers assume this means a helicopter will arrive if they are sick or injured. However, this coverage is riddled with operational and financial limitations, especially at high altitudes. A « standard » policy may cover evacuation, but it often fails to account for the specialized requirements of high-altitude rescue, creating a dangerous coverage gap. The physics of aviation are a key factor; standard helicopters have severe performance degradation in thin air.
This reality is starkly illustrated by rescue operations in the Himalayas. As a case study, a typical evacuation from Everest Base Camp (5,364 meters) is not a simple affair. Standard helicopters lose a significant percentage of their lifting capacity with every thousand feet of elevation. A rescue at this altitude requires a specialized, high-performance aircraft like the AS350 B3e. According to an analysis by Air Dynasty, a leading operator in the region, a rescue from Everest Base Camp to Kathmandu can cost between $3,000 and $10,000. If your policy has a low sub-limit for high-altitude rescue or doesn’t cover non-medical evacuations, you could be liable for the entire cost.
Therefore, your due diligence involves more than just checking a box for « medevac. » You must verify the policy’s specific altitude limit for helicopter rescue and the maximum monetary coverage for such an event. Many policies cap coverage at 4,000 meters (approx. 13,123 feet) unless a specific high-altitude trekking or mountaineering rider is purchased. Failing to secure this rider is a direct breach of the policy’s terms if you are traveling above that elevation, giving the insurer clear grounds for claim denial. Always confirm that your coverage explicitly matches the maximum altitude of your itinerary.
Garmin inReach vs Spot: Which Device Saves Lives in Dead Zones?
When you are outside of cellular range, a satellite messenger is not just a piece of gear; it is your primary link to assistance and a crucial tool for creating your evidentiary trail. The choice of device has direct implications for insurance claims. The key difference lies in communication capability and network reliability. From a claims perspective, the ability to have a two-way conversation and create a detailed, verifiable GPS track log is paramount. It allows for pre-authorization of a rescue and proves you followed your planned route.
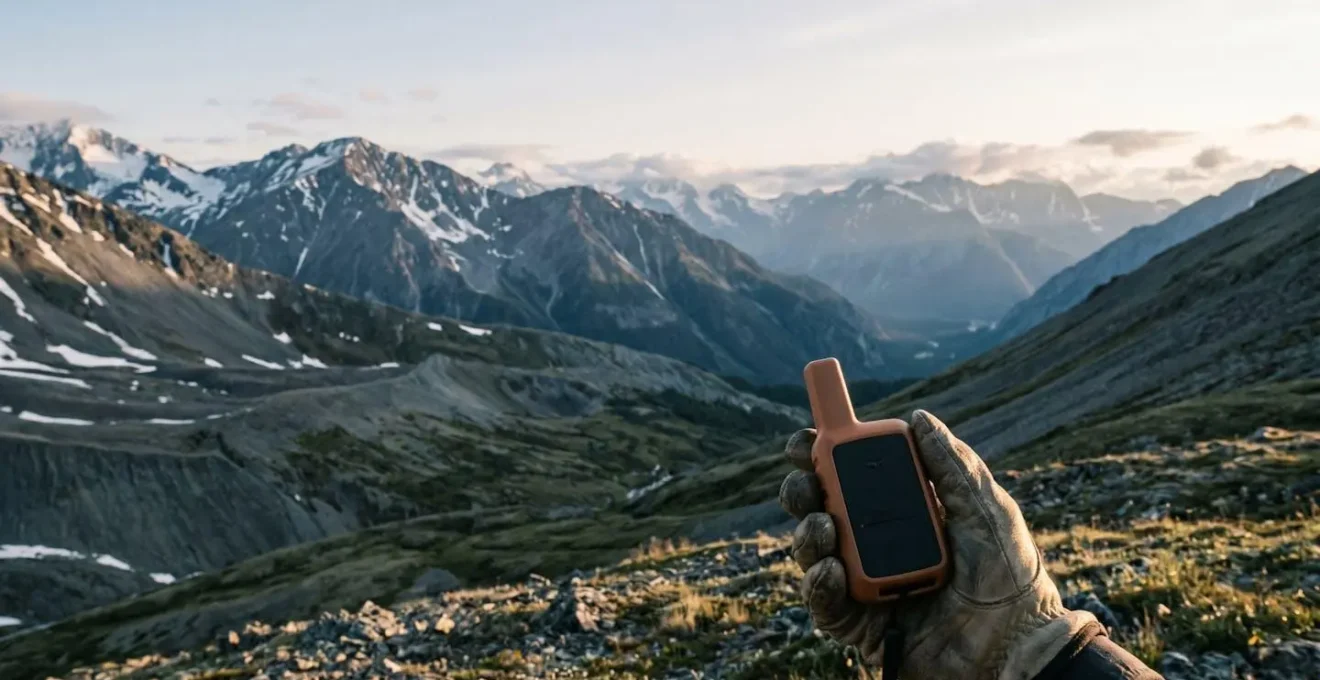
The two leading contenders, Garmin inReach and SPOT, operate on different satellite networks and offer different levels of functionality. The Garmin inReach series uses the Iridium satellite network, which has global pole-to-pole coverage. SPOT devices use the Globalstar network, which has known gaps in coverage, particularly in polar regions and parts of the mid-ocean. For an insurer, a continuous GPS track is proof of your location and adherence to your stated itinerary. Gaps in that track create ambiguity that can complicate a claim.
The most important distinction for insurance purposes is the ability for two-way messaging. This feature allows you to communicate the full context of your emergency to the assistance provider, receive instructions, and obtain the necessary pre-authorization for an evacuation. A simple SOS signal from a one-way device does not provide this crucial context.
This table, based on an in-depth analysis of device features for emergency use, highlights the critical differences from an insurance compliance standpoint.
| Feature | Garmin inReach Mini 2 | SPOT X | Insurance Relevance |
|---|---|---|---|
| Two-way Communication | Yes – Full messaging | Yes – With QWERTY keyboard | Critical for pre-authorization and claim documentation |
| Satellite Network | Iridium (66 satellites) | Globalstar (24 satellites) | Iridium offers more reliable global coverage for tracking proof |
| Signal Acquisition | 30-60 seconds | 60-120 seconds | Faster connection = quicker emergency response documentation |
| Tracking Log Detail | Comprehensive GPS breadcrumb trail | Basic location check-ins | Detailed logs provide stronger evidence of route adherence |
| Message History | Full conversation threads stored | Limited message storage | Essential for proving communication with assistance services |
| Battery Life (tracking mode) | Up to 14 days | Approx. 10 days | Longer battery = continuous documentation capability |
Ultimately, a device with robust two-way messaging and a reliable tracking log provides a stronger, more detailed record. This documentation is not just for rescue; it is your primary evidence to demonstrate to your insurer that your actions were measured and your need for assistance was legitimate.
How to Verify a Guide’s Certification in Unregulated Countries?
Hiring a guide for a high-risk expedition is a common risk mitigation strategy. However, many insurance policies contain a « negligence » or « due diligence » clause. Hiring an unqualified guide can be interpreted as a negligent act, potentially voiding your coverage if an accident occurs. In many popular adventure destinations, the guiding industry is unregulated, making it difficult to distinguish between experienced professionals and charismatic amateurs. Therefore, the onus is on you to perform what we call « proxy vetting »—a process of verification to prove you exercised sound judgment.
The gold standard for mountaineering and ski guiding is the International Federation of Mountain Guides Associations (IFMGA/UIAGM). This certification is the highest level of professional qualification in the world. As noted by the American Mountain Guides Association, the process of obtaining IFMGA credentials can cost upwards of $50,000 and take around five years to complete. This level of investment separates true professionals from casual operators. For trekking at lower altitudes, the UIMLA (Union of International Mountain Leader Associations) is another recognized credential.
When a guide claims a certification, you must verify it independently. This means not just taking their word for it, but checking their name against the member directory of the relevant association (e.g., the IFMGA website). If no such certification exists, you must document your efforts to assess their competency through other means. This includes requesting verifiable expedition logs, confirming they carry their own professional liability insurance, and conducting a competency interview with specific technical questions.
Your 5-Step Proxy Vetting Checklist for Guide Verification
- Check International Body Membership: Verify if the guide belongs to IFMGA or UIMLA, the only two internationally recognized mountain qualifications, by checking the official member lists.
- Request Verifiable Expedition Logs: Ask for documented evidence of past climbs, including dates, routes, and client references that can be independently confirmed.
- Verify Professional Liability Insurance: A legitimate professional guide will carry their own liability insurance. Request to see a current certificate of coverage and note the provider.
- Conduct the Competency Interview: Ask specific technical questions like, « What is your protocol for managing a client with signs of HACE at high camp? » or « What are the three most common causes of accidents on this route and how do you mitigate them? » Document their responses.
- Analyze Digital Footprint Consistency: Cross-reference the guide’s claimed experience across their website, social media, and any guiding registries to check for inconsistencies.
Diligently following and documenting these steps creates a record that proves you did not act negligently in your choice of guide, a critical piece of evidence should you need to file a claim.
The « Last Minute » Vaccination Mistake That Ruins Jungle Expeditions
For expeditions to tropical or remote regions, compliance with medical recommendations is a key component of your insurance contract. Policies often contain clauses that can void coverage if you fail to take « reasonable precautions » to protect your health. This includes adhering to recommended or required vaccination schedules. The most common and costly mistake is underestimating the lead time required for multi-dose vaccines and prophylactic medications. Believing you can get your shots a week before you fly is a direct route to an invalidated policy.

Many essential vaccines for jungle environments, such as those for Rabies or Japanese Encephalitis, require a series of injections spread out over several weeks. For example, the standard schedule for the Japanese Encephalitis vaccine involves two doses administered 28 days apart. Malaria prophylaxis must often be started one to two weeks before entering an endemic area. Arriving in a country without the legally required Yellow Fever certificate—which must be administered at least 10 days before travel to be valid—can not only result in denial of entry but will also void any insurance coverage related to contracting the disease.
Your responsibility is to consult a travel medicine specialist at least two to three months before your departure. This consultation, along with your vaccination record, becomes part of your evidentiary trail. It proves you sought and followed expert medical advice, satisfying the « reasonable precautions » clause of your policy.
The following table, with information derived from public health bodies like the Centers for Disease Control and Prevention (CDC), illustrates the critical timelines that must be respected to ensure both medical efficacy and insurance compliance.
| Vaccine | Standard Schedule | Accelerated Option | Minimum Pre-Travel Window | Insurance Implications |
|---|---|---|---|---|
| Japanese Encephalitis | 2 doses: Day 0 and Day 28 | 2 doses: Day 0 and Day 7 (ages 18-65 only) | 1 week after final dose | Recommended vaccines may be required for claim validity in endemic areas |
| Rabies (Pre-Exposure) | 3 doses: Day 0, Day 7, Day 21-28 | 3 doses: Day 0, Day 3, Day 7 | Immediate (partial protection) | Failure to vaccinate when recommended can void claims for animal bite injuries |
| Malaria Prophylaxis | Start 1-2 weeks before travel | Varies by medication type | 1-2 weeks (must continue during and after trip) | Non-compliance with prescribed prophylaxis schedule = claim denial if contracted |
| Yellow Fever | Single dose | N/A | 10 days before travel | Often legally required for entry; lack of certificate = no coverage in many policies |
Failure to adhere to these timelines is not a minor oversight; it is a material breach of your responsibility to mitigate risk, and insurers will not hesitate to deny a claim on these grounds.
When to Abort an Expedition: 3 Weather Signs You Must Obey?
The decision to turn back is one of the hardest but most important calls to make in the mountains. From an insurance perspective, it’s also one of the most scrutinized. If you are evacuated from a storm you should have seen coming, your insurer may argue negligence. The « acts of God » defense is not a blank check; you are expected to make reasonable decisions based on observable data. Therefore, knowing when to abort an expedition—and documenting *why* you made that decision—is crucial for contractual compliance.
Your GPS watch, altimeter, and your own eyes are critical data-gathering tools. Abstract weather forecasts are useful, but what matters is your response to the immediate, observable conditions. An insurer, such as Chubb Adventure Travel Insurance, expects you to act on clear warning signs. Creating a time-stamped record of these observations and your subsequent decision via your satellite messenger provides irrefutable proof that you acted responsibly, not recklessly.
Here are three expert-level weather signs that demand an immediate decision to descend, along with the documentation protocol that will support a potential insurance claim:
- Lenticular Cloud Formation Over Peaks: These distinct, lens-shaped clouds indicate extreme high-altitude winds (often over 80 mph) and severe atmospheric turbulence. They are a non-negotiable sign that conditions on the upper mountain are becoming untenably dangerous. Decision Protocol: Abort the ascent immediately. Send a timestamped satellite message and take a photo, noting « Aborting climb due to lenticular cloud formation, indicating extreme winds at summit. »
- Rapid Barometric Pressure Drop (>3 hPa in 3 hours): A sudden, sharp drop in atmospheric pressure, monitored on your altimeter or GPS watch, is a classic indicator of an approaching storm system. At altitude, this often precedes the arrival of severe weather within 6-12 hours. Decision Protocol: Immediately begin descent to a lower, safer camp. Document the pressure drop with a timestamped message: « Barometric pressure drop of 4 hPa in 3 hours. Descending to Camp 2 as per storm protocol. »
- Wind Direction Reversal with Increasing Speed: When the prevailing wind suddenly shifts 180 degrees and its speed increases, it often signals the passage of a weather front. This is a critical abort signal, especially when combined with a drop in temperature or visibility. Decision Protocol: Turn back. Create a timestamped record via satellite messenger: « 14:30 local time: Turning back at 6100m. Wind shift and rapid increase in speed indicate approaching front. Abiding by pre-agreed turnaround time. »
This disciplined approach to observation and documentation transforms a subjective judgment call into a verifiable, data-driven decision, protecting you from allegations of negligence.
Outdoor Adventure Tech: Which Satellite Messenger Is Essential for Off-Grid Safety?
While choosing the right individual satellite messenger is a critical first step, a professional approach to off-grid safety treats it as one component within a larger, redundant system. Relying on a single device for communication and emergency signaling introduces a single point of failure—batteries die, devices break. From an insurance standpoint, demonstrating a multi-layered safety ecosystem reinforces the argument that you took every reasonable precaution. It is a powerful counter to any potential claim of negligence.
Building this redundant system involves integrating several pieces of technology, each with a specific role. The goal is to ensure you have overlapping capabilities for communication, emergency signaling, and navigation. This approach shows a level of preparedness that insurers value highly when assessing a claim, as it demonstrates a systematic approach to risk management rather than a simple reliance on one gadget.
The core of this ecosystem consists of three layers, complemented by a robust power management strategy and a deliberate protocol for data creation:
- Layer 1: Primary Communication (Two-Way Satellite Messenger): This is your workhorse device (e.g., a Garmin inReach). Its primary function is two-way communication with your support team and the insurer’s 24/7 assistance line, essential for pre-authorization and creating detailed GPS tracking logs that form your evidentiary trail.
- Layer 2: Emergency Backup (Personal Locator Beacon – PLB): A separate 406 MHz PLB is your ultimate emergency backup. PLBs operate on the dedicated Cospas-Sarsat satellite system, which is monitored by international rescue coordination centers. It provides a vital redundant emergency signal if your primary messenger fails.
- Layer 3: Data Trail & Biometrics (GPS Watch): A GPS-enabled watch serves as a tertiary navigation tool and, crucially, creates an additional, independent data trail of your route, altitude, and even biometrics like heart rate and blood oxygen levels. This data can be invaluable for corroborating the details of an incident.
Finally, a meticulous power management strategy is the glue that holds this ecosystem together. This includes using cold-weather-rated lithium batteries, keeping devices warm, carrying a high-capacity (10,000+ mAh) backup battery pack with a solar charger, and establishing strict, scheduled power-on times to conserve energy. This entire system should be designed to create and preserve location data, which is both an asset (proving you stayed on-route) and a potential liability (proving if you entered a restricted area).
Eco-Conscious Outdoor Adventure Exploration: How to Hike National Parks Without Leaving a Carbon Footprint?
The principle of « Leave No Trace » is more than an environmental ethic; it is a critical component of insurance compliance. Nearly every travel insurance policy contains an « illegal acts » exclusion clause. This clause states that the policy will not provide coverage for any loss, injury, or damage that occurs while the policyholder is committing or attempting to commit an illegal act. While most travelers associate this with serious criminal activity, the definition is far broader and includes the violation of local laws and park regulations.
This means that actions such as camping in a restricted zone, starting a fire during a fire ban, approaching wildlife against park rules, or flying a drone in a no-fly zone are not just minor infractions—they are illegal acts that can instantly void your insurance coverage. If you require rescue as a direct or indirect result of such a violation, your insurer has clear and firm grounds to deny all associated claims, leaving you personally liable for what can be astronomical costs.
The connection between environmental rules and insurance is absolute. Your responsibility as a policyholder is to know and abide by the specific regulations of every park, reserve, and jurisdiction you enter. Ignorance of the law is not a defense.
Case Study: How Environmental Violations Void Insurance Coverage
Consider a scenario where a hiker, exploring a national park during a dry season, ignores a clearly posted fire ban and starts a small campfire for cooking. A sudden gust of wind spreads the embers, triggering a wildfire. The hiker becomes trapped and requires an emergency helicopter evacuation. In the subsequent claim investigation, the insurer discovers the fire ban violation. Because starting the fire was an illegal act, the exclusion clause is invoked. The insurer denies the claim for the evacuation, which could exceed $50,000, and the hiker may also face legal prosecution and liability for the full cost of fighting the wildfire.
Before your trip, you must research and document the specific rules of the area: fire regulations, designated camping areas, wildlife interaction distances, and any other local ordinances. Adhering to these rules is not just about being a responsible traveler; it is a fundamental requirement for keeping your insurance policy in force. Your compliance is a key part of your contractual obligation.
Key Takeaways
- Your insurance policy is a contract; you must prove compliance with its terms, especially regarding altitude limits, guide qualifications, and personal conduct.
- Technology like a two-way satellite messenger is not for convenience, but for creating a verifiable evidentiary trail (GPS logs, communications) to support a claim.
- Violating local laws, including minor park regulations like fire bans, falls under the « illegal acts » exclusion and can immediately void your entire policy.
Outdoor Adventure Tech: Which Satellite Messenger Is Essential for Off-Grid Safety?
Possessing the right satellite technology is only half the battle. The other, more crucial half is knowing precisely how to use it in a manner that satisfies the procedural requirements of an insurance claim. When an emergency strikes, your communication via satellite messenger initiates a formal process. The content, timing, and clarity of your messages will be logged, reviewed, and scrutinized. A panicked, incomplete SOS is far less effective than a calm, structured report that provides the necessary information for both rescue and insurance validation.
The single most important procedure to understand is pre-authorization. Many policies require you to contact the 24/7 assistance company *before* initiating a costly action like a private helicopter evacuation. Activating your PLB or calling for a rescue without this step can be grounds for claim denial, unless you were unconscious or otherwise physically unable to communicate. Your two-way messenger is the tool for this critical conversation. The goal is to get explicit approval for the proposed course of action and its associated costs.
Your communication protocol during an emergency should be clear and factual, designed to build your case. Your first message to the emergency assistance provider should follow a structured format, such as the METHANE report model used by emergency services:
- M – Major incident declared: « Declaring major incident. »
- E – Exact location: Provide GPS coordinates from your device.
- T – Type of incident: « Fall with suspected leg fracture, » or « Symptoms of severe HAPE. »
- H – Hazards: « High winds, » « Avalanche risk, » « Nightfall approaching. »
- A – Access: « Helicopter access possible, » or « Foot access only. »
- N – Number of casualties: State the number of injured persons.
- E – Emergency services required: « Requesting helicopter evacuation. »
Following this initial report, maintain a log of all communications. Do not delete messages. This thread becomes a legal record of the event, your condition, and the instructions you received from the assistance provider. It is your best defense against any suggestion that you acted rashly or that the evacuation was one of « convenience » rather than medical necessity—a common reason for claim denial.
Ultimately, your travel insurance is a tool, and its effectiveness depends entirely on how you use it. By shifting your mindset from passive policyholder to active risk manager—meticulously documenting your due diligence, understanding your contractual obligations, and building an evidentiary trail—you transform your policy from a hopeful gamble into a reliable financial safeguard. The next logical step is to review your current or prospective policy with this new framework in mind, identifying the specific clauses that require your proactive compliance.